The Powder Brow process gives the brows a light, organic powder look. This technique uses a small needle to go softly over the skin, which will create layers of pigment. Some refer to this as Ombre powder brows, stardust brows, or machine shading.
This service enables us to customize our client's brows based on what they personally find appealing. We could go for light and natural or have the option to use more pigment for a bolder look.
Most skin types respond just fine to powder, as opposed to micro blading which varies more. The powder is extremely gentle, gives a better balance of color, and lasts the longest compared to other semi-permanent eyebrows techniques.
Powder eyebrows last anywhere from one to five years – contingent on your skin type, lifestyle, and adherence to aftercare. This technique applies a very shallow marking, and your skin's first instinct is to heal away the ink. The severity of this happening depends on your skin’s physiology and your adherence to aftercare on your brows.
This treatment is very gentle on your skin and should heal in about 8 -12 dependent on the individual person. (it takes full four weeks for the final color to settle down) Keep in mind that time varies from case to case.
1. Consultation
We will discuss your style preference and help you decide color and shape. You should bring pictures of the look you’d like to achieve.
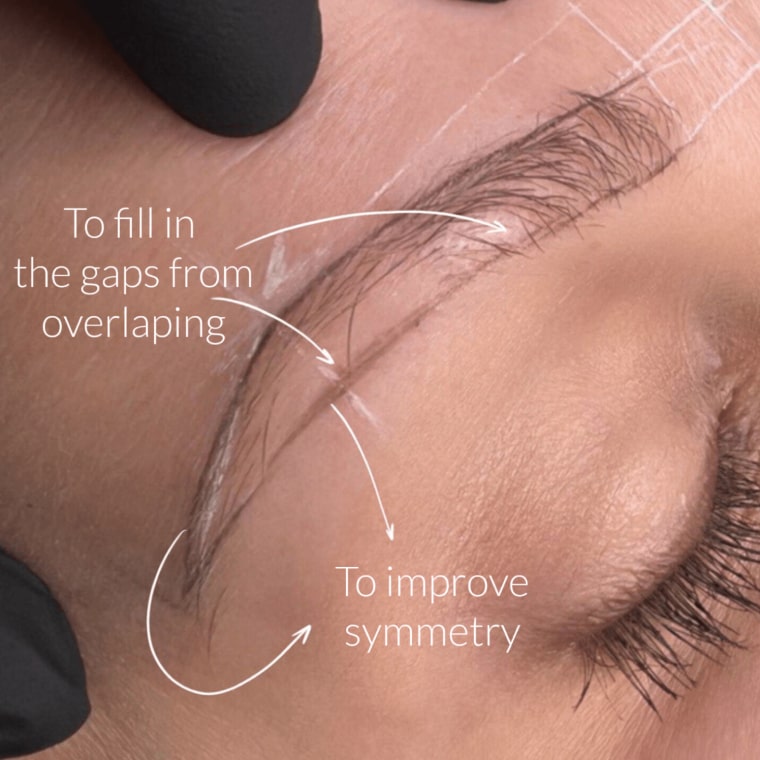
2. Topical anesthetic
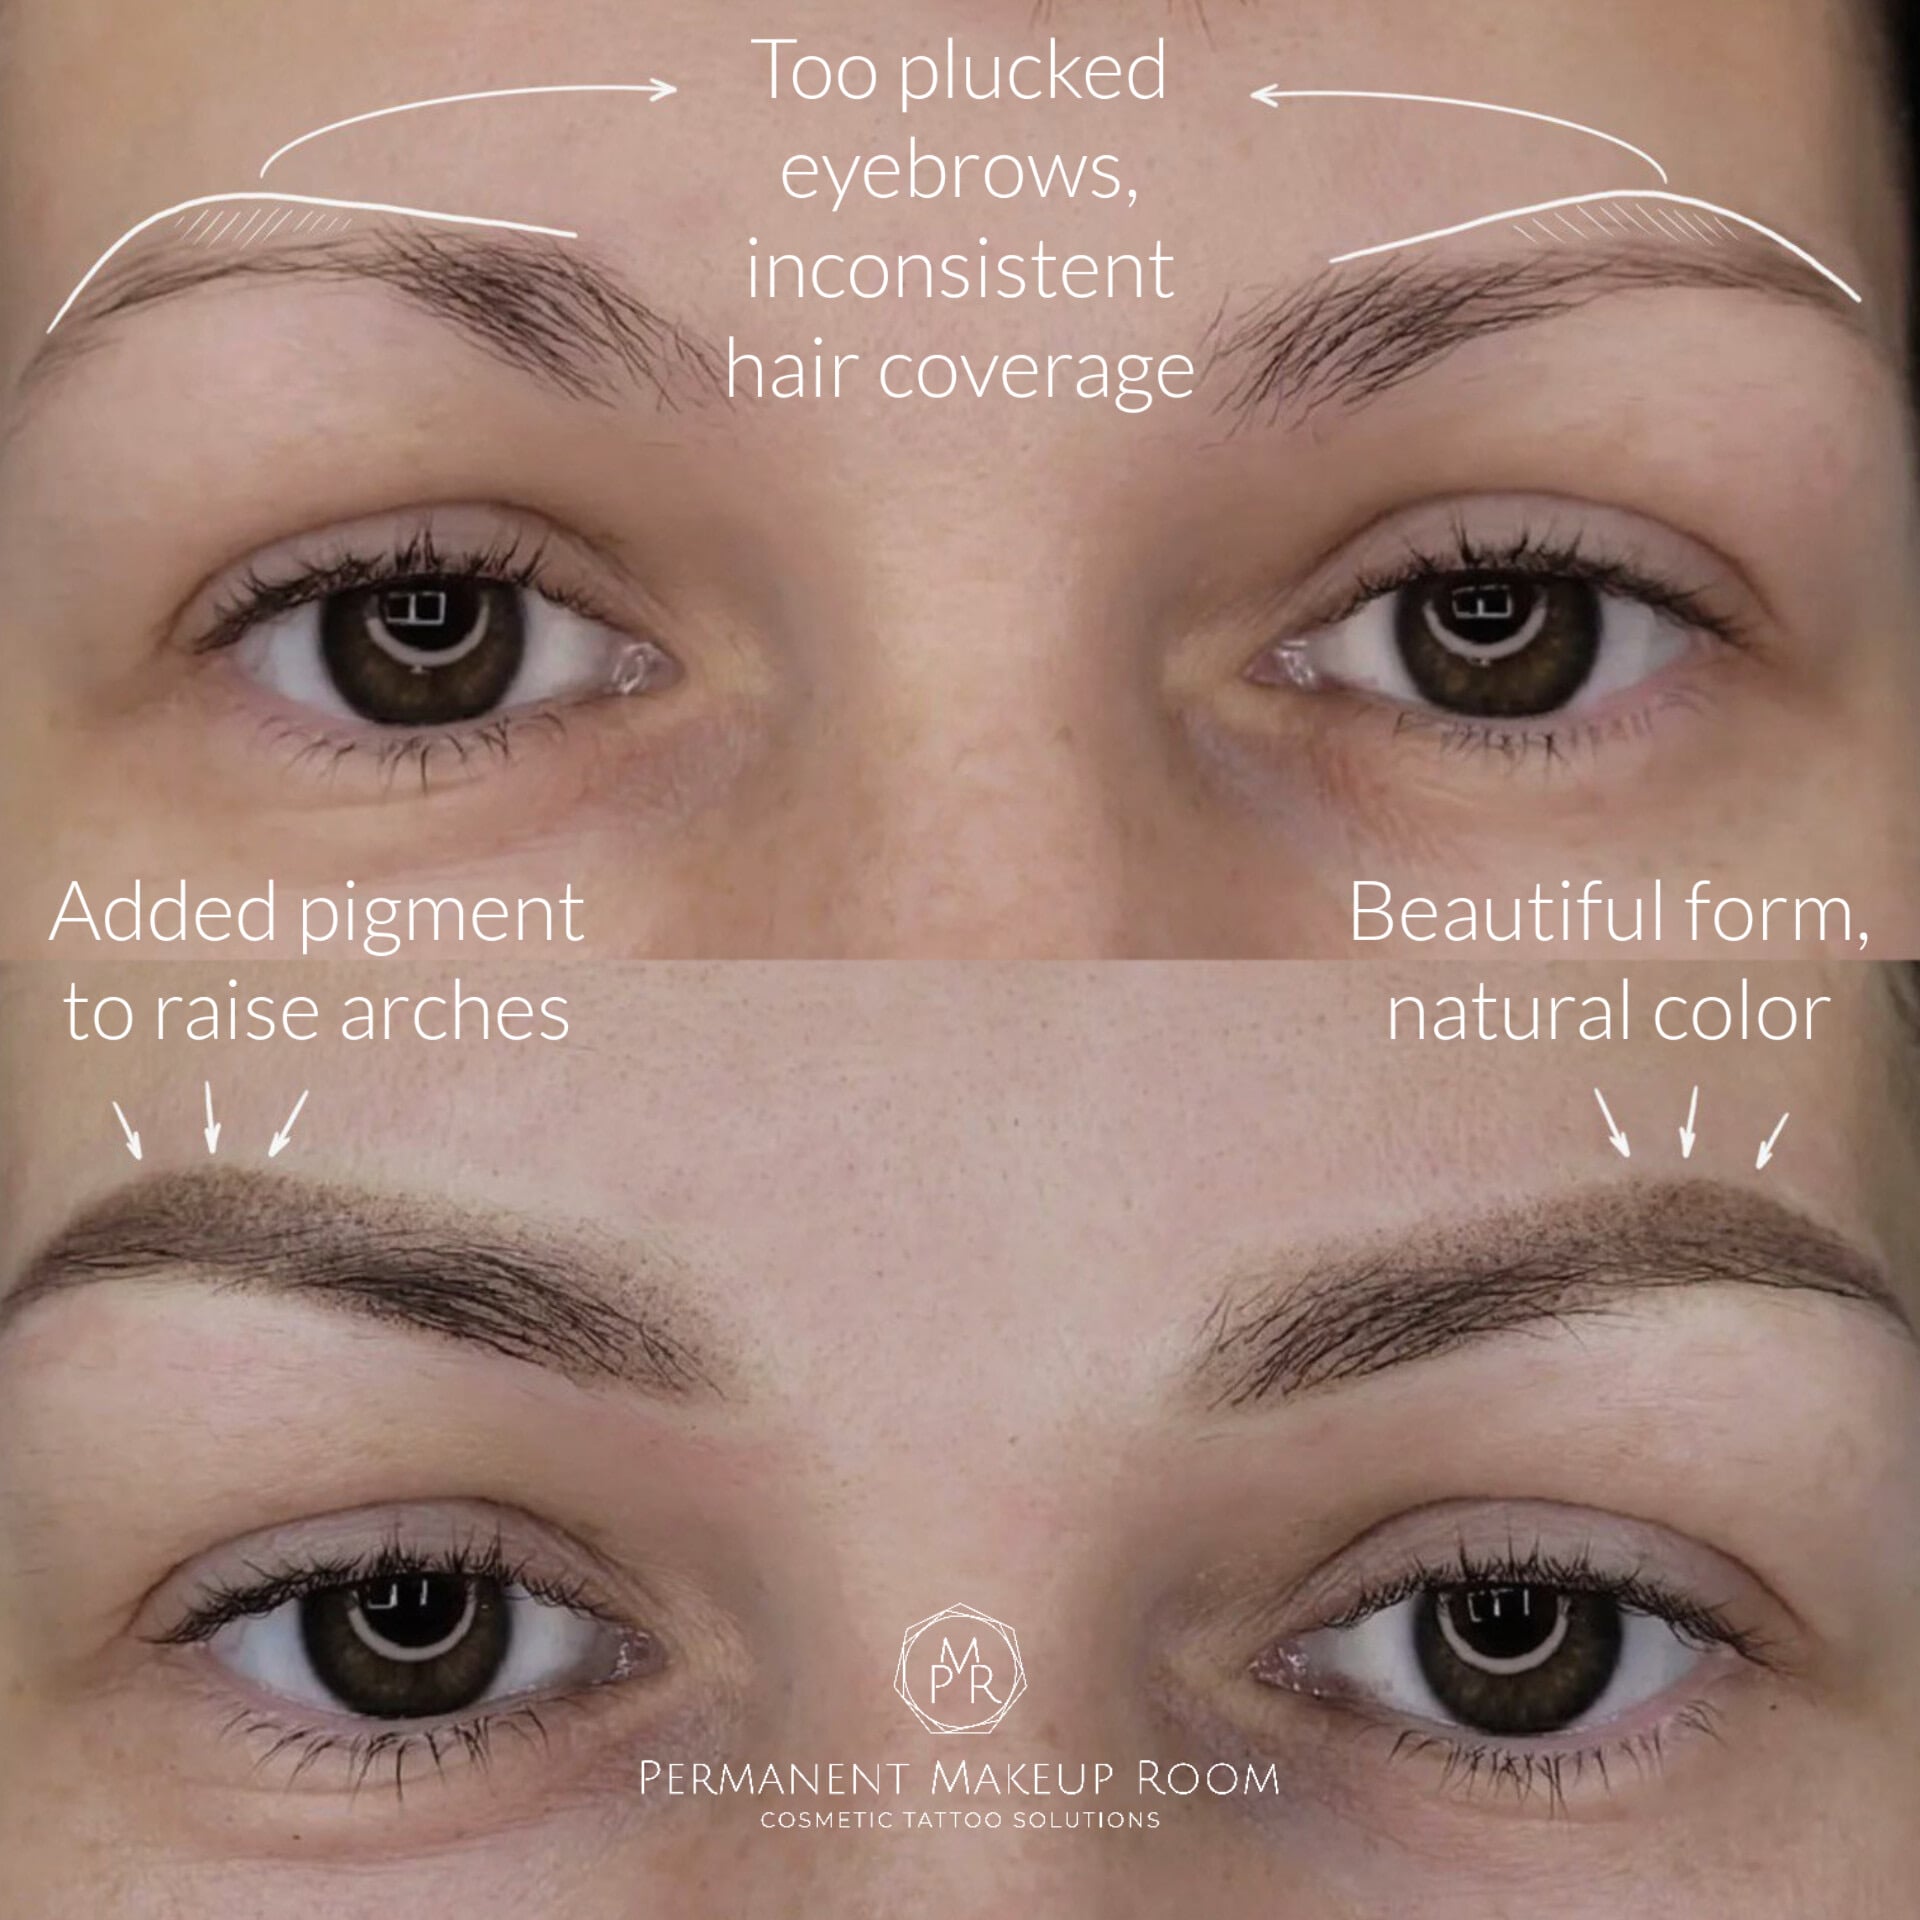
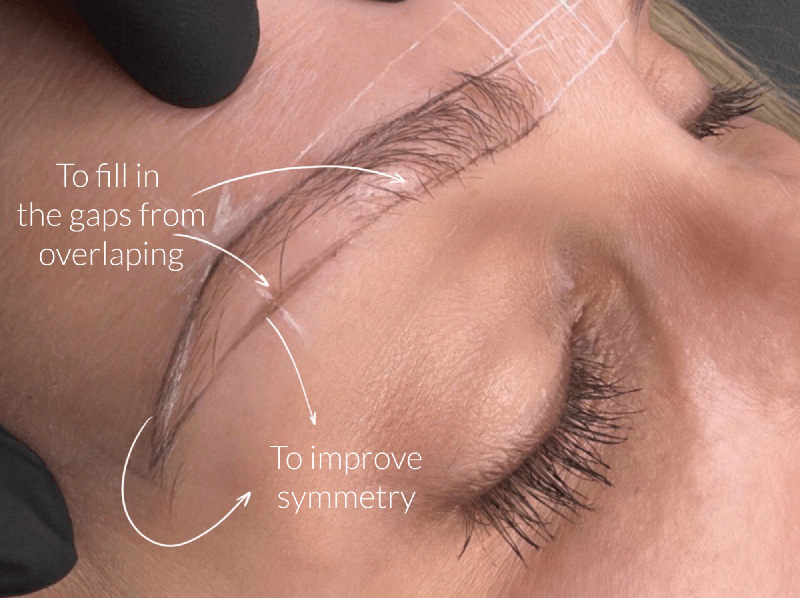
To make the process comfortable for you your artist will apply a topical anesthetic to numb the pain. This will sit on the skin for about 15-20 minutes before the procedure begins. The powder is a great way to fill in the gaps from over-plucking and to improve brow asymmetry.
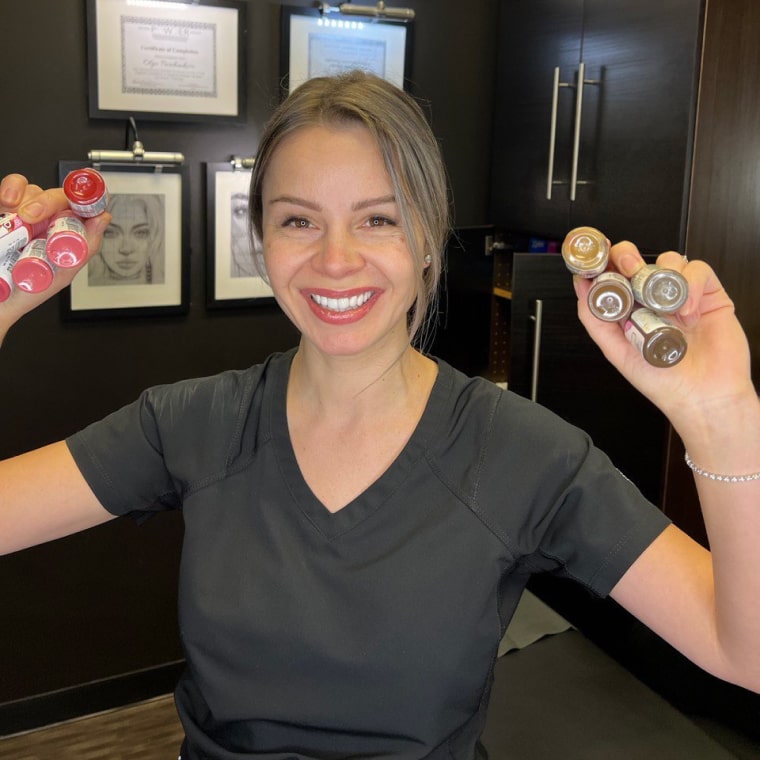
3. Deciding on a pigment
You will discuss your desired look with your artist, and we will help you choose the best color to suit you based on your hair color, eye color, etc.
4. Deciding on a shape
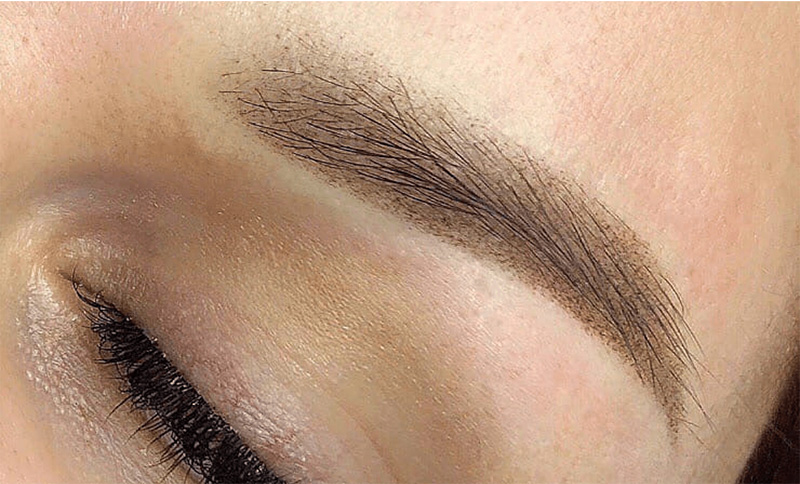
We will draw an outline of the brow and you can adjust it until you achieve the desired shape. We also will help you decide on a shape based on your specific face features, the shape of your face, symmetry, etc. After this, the procedure begins. Light and natural look of powder brow.
5. Beginning the needling
We will create many fine dots with the machine and then add the pigment over them. If you experience any pain, you can ask your artist if another layer of numbing cream is added.
6. Final pigment layer
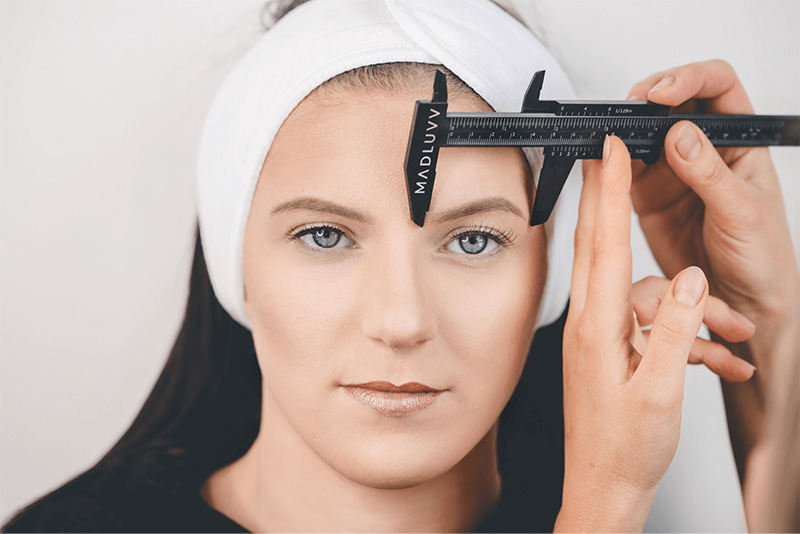
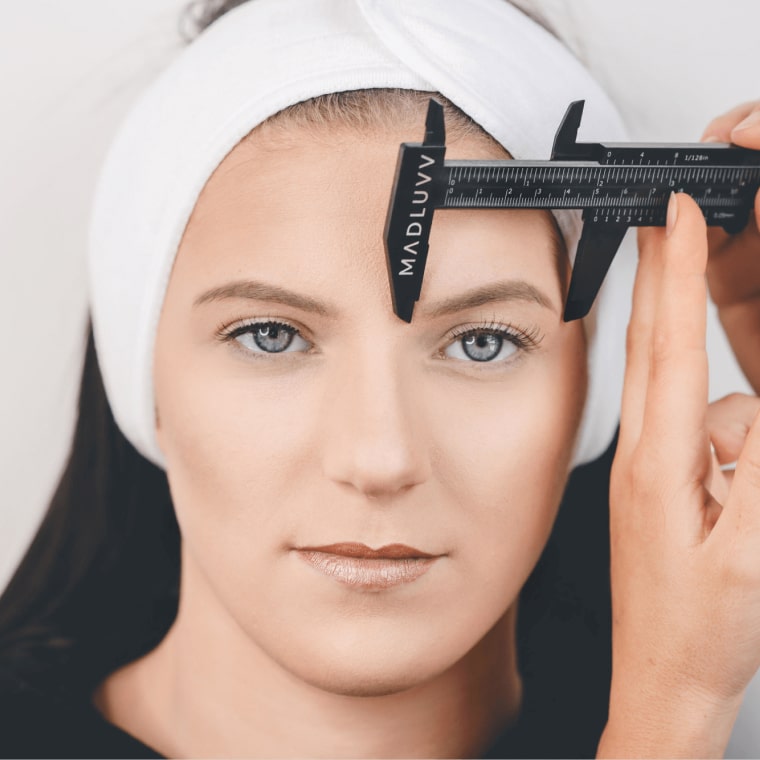
Lastly, another layer of pigment is added then we will clean the brow area. Mapping and proper measuring an important steps in every brow appointment
Is semi-permanent Makeup for everyone?
Sadly, not everyone can get semi-permanent makeup. There are certain reasons you may not be able to, however, the majority of people can receive this treatment. before clients go through with the treatment, they will be informed of any conditions that make them eligible for the treatment.
Some of these are:
*(If any of the below apply to you, we ask that you have a written doctors note that approves you can continue with the procedure).
- Fillers or Botox around your eyes 3 weeks before the appointment.
- Breastfeeding or pregnant.
- Recent surgeries (please contact your doctor)
- Significant heart issues (consult with your doctor first)
- Using blood thinners (please check with your doctor if can be discontinued around the time of your lip appointment)
- Transplanted organs.
- Diseases/ Infections that could challenge healing.
- Accutane (have to wait a year)
- Hemophiliac
- Prone to scarring.
- Chemotherapy (Please consult with your doctor. Usually, it has to be at least two months before going through chemotherapy)
- Epilepsy
- Hepatitis
- Diabetes -if not regulated
- Cardiovascular problems.
- Have a Pacemaker (contact your doctor)
- Having a cold, covid, flu, viral infection, high fever, etc. around the time of your appointment.
- Autoimmune disorders (case by case basis)
- Laser treatment in the past 30 Days.
- Healing problems.
If a client disregards anything on this list, we are within our rights to cancel the appointment and the client's deposit will be forfeited. When in doubt, request a doctor's note.
1 month prior to procedure
Avoid:
- Stop using “anti-aging” such as Retinol, vitamin C, and hydraulic acids. It will fade your pigments a lot faster if used before a PMU appointment or before healing is completed (3-4 weeks after)
- Botox or filler close to your permanent makeup area.
2 weeks prior to procedure
- Stop the use of tanning beds and sunbathing.
1 weeks prior to procedure
Avoid:
(*If you are taking or medically prescribed anything listed below consult with your doctor before your procedure.)
- Naproxen, Advil, Motrin, and Ibuprofen. If needed, you may take Tylenol/Acetaminophen.
- Extreme sun exposure (tanning beds/sunbathing).
- Marijuana and smoking.
- DHA supplements, turmeric, fish oils, vitamin e, niacin, cayenne supplements.
- Any blood thinners along with anything that may cause your blood to thin. Including B6, Niacin, omega 3, Evening primrose, Vitamin E, Gingko Biloba, Ibuprofen, or Aspirin.
- No waxing around the treated area.
1-3 days prior to procedure
Avoid:
- Caffeine. Do not consume more than 250mg of caffeine a day, including Coffee, tea, etc. (No more than a half a cup daily.)
- Any alcohol. (No red wine.)
Day of procedure
Avoid:
- No makeup on the treated area.
- Extreme exercise (You may do light workouts such as yoga or walking).
- No caffeine or alcohol 24 hours before your appointment.
Bring with you:
- Any inspirational pictures you may have of your desired look for the procedure.
AFTERCARE FOR EYEBROWS
Day 1 (Day of procedure)
Every 20-40 minutes use a clean cotton round soaked in a special solution (which will be provided after your treatment) and lightly tap your eyebrows to remove the lymphatic fluids. (doing so will help to make the scabbing a lot lighter)
Days 2-10
- Cleansing your eyebrows with a soup or a gentle cleanser morning and night
(washing will not lighten or get rid of pigment) - Using the cleanser and water lightly rub rinse with water.
- Lightly tap the skin with a dry cloth to ensure it is completely dry.
- Hydrating your eyebrows with the moisturizing ointment for 9 days morning and evening right after using the cleanser.
- Using a cotton swap, apply a small amount of ointment on your eyebrows.
- Use a very thin layer of ointment, your skin needs to brief through the ointment.
- Make sure your skin is dry.
- While showering, do not get your face wet.
- No facials, antiaging treatments, or products (Retinol, acids, vitamin C serums ) for 4 weeks.
Other important information
- Avoid touching the treated area. It can cause lightening in color, scarring, or infections.
- Limit sun exposure and avoid sunbathing or tanning.
- Keep the pillowcase clean. Try not to sleep on your face
- No makeup or sunscreen on your eyebrows for 3 weeks.
- Avoid any water activities until your eyebrows scab(7-12 days)
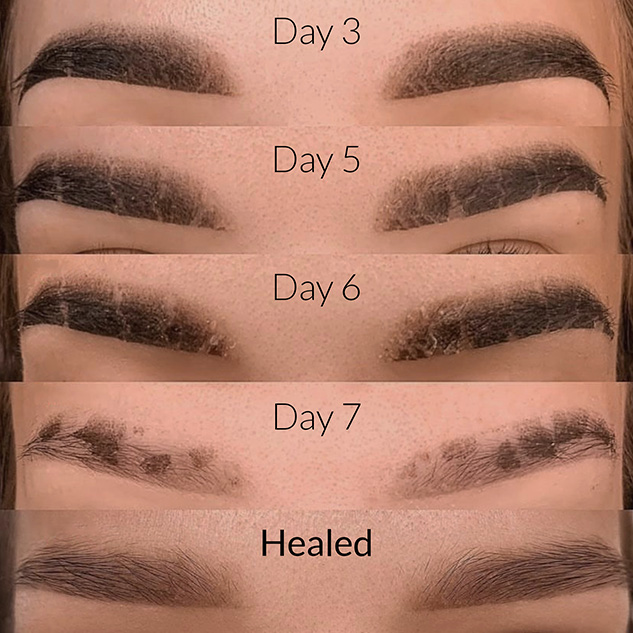
HEALING PROCESS FOR EYEBROW TATTOOS
It will take about around 4 for the eyebrows to heal completely. You must wait to schedule a touch-up until after this time frame because the tissue underneath the surface of your skin takes the full 6-8 weeks to recover. However, the surface doesn’t take as long to heal. Throughout the healing process, your brows may appear rough looking, but this is normal so do not be worried.
Days 1-3
Your eyebrows will appear several shades darker.
Days 4-7
Your eyebrows will start being a bit itchy. Please avoid touching or scratching it. A scab will start to form.
Days 8-12
The scabs start to peel. Do not pick at scabs or the area surrounding the scabs.
Day 13-20
Your skin will stop peeling around that time. Pigments may appear too light after peeling off; however, they will slowly get darker in a couple of weeks.
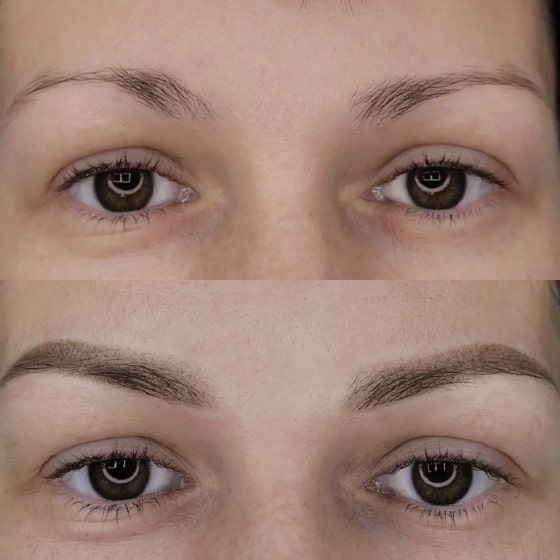
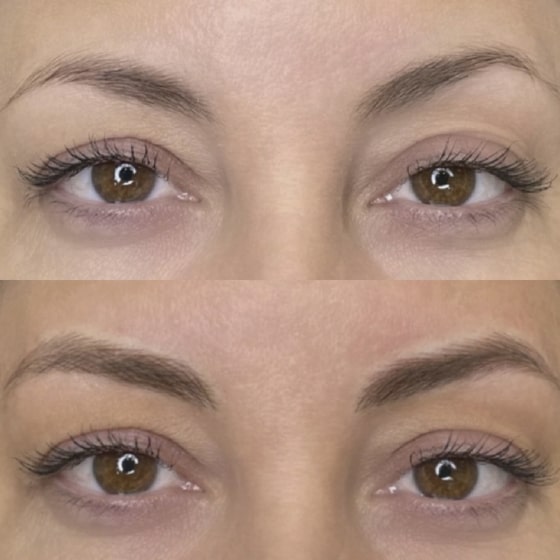
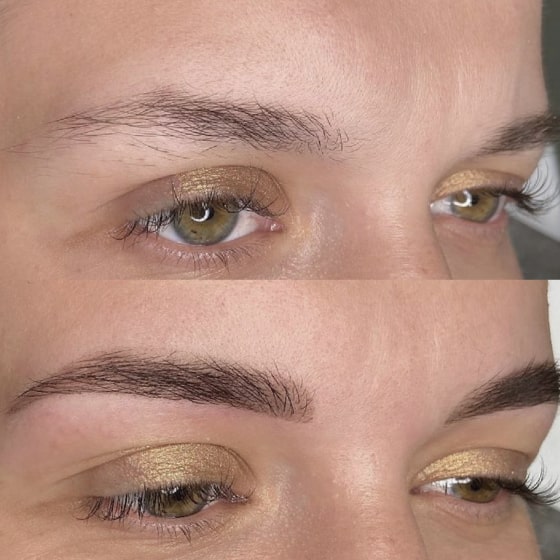
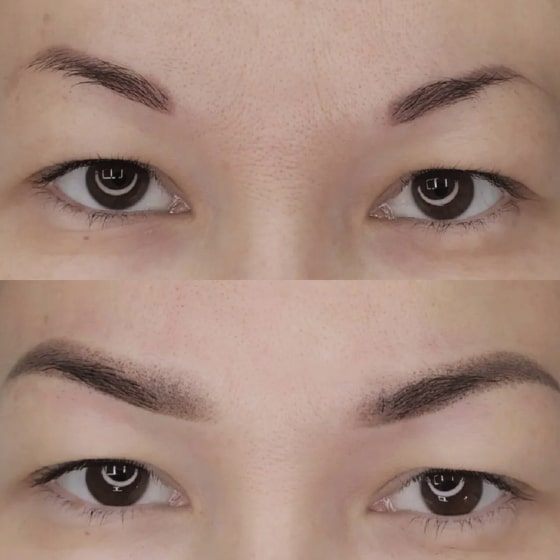
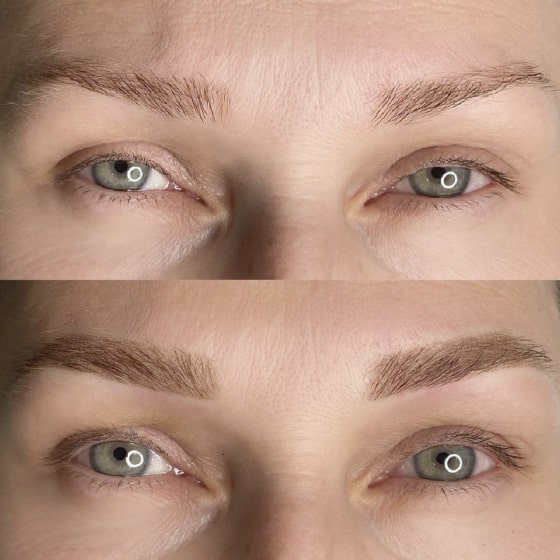
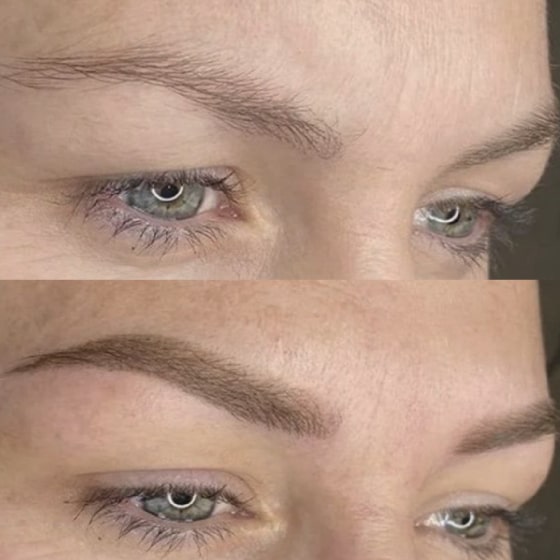
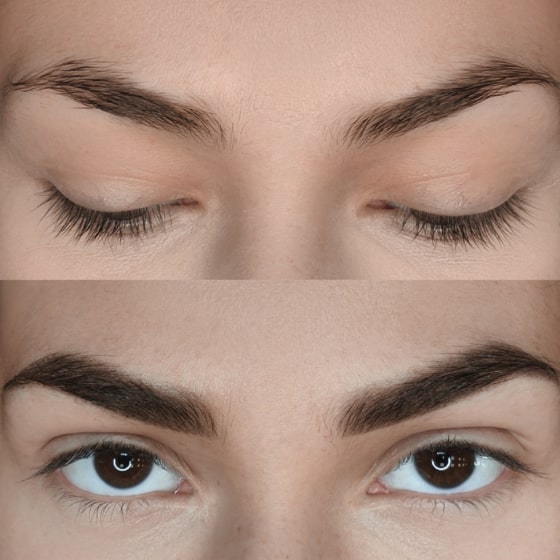
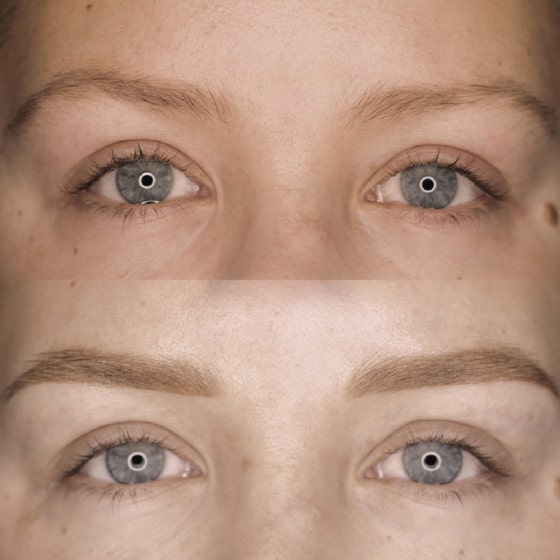
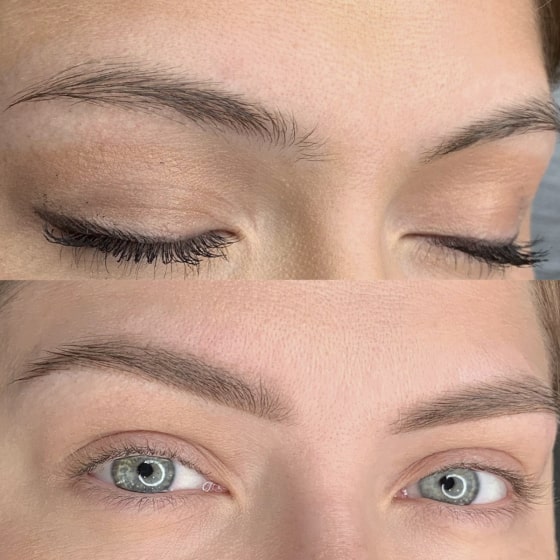
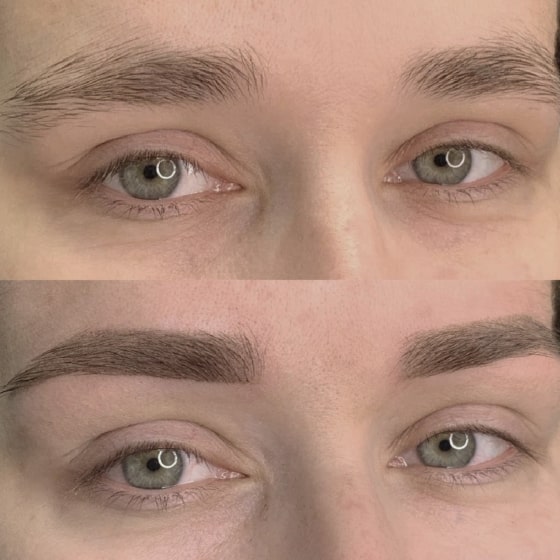
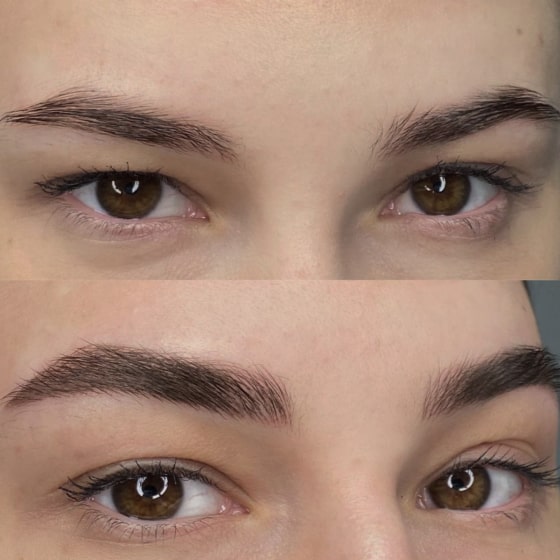
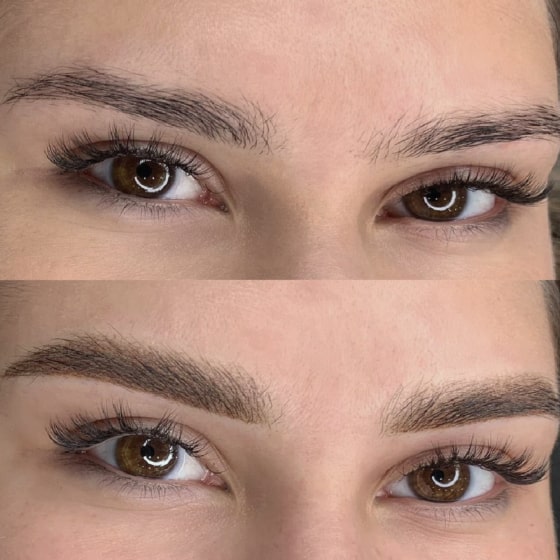
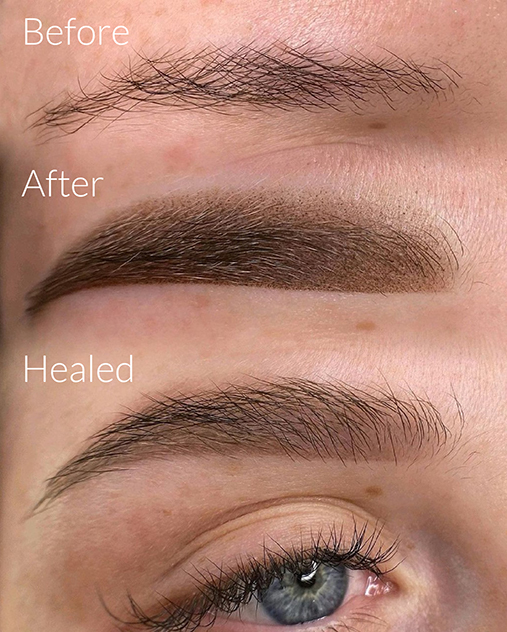
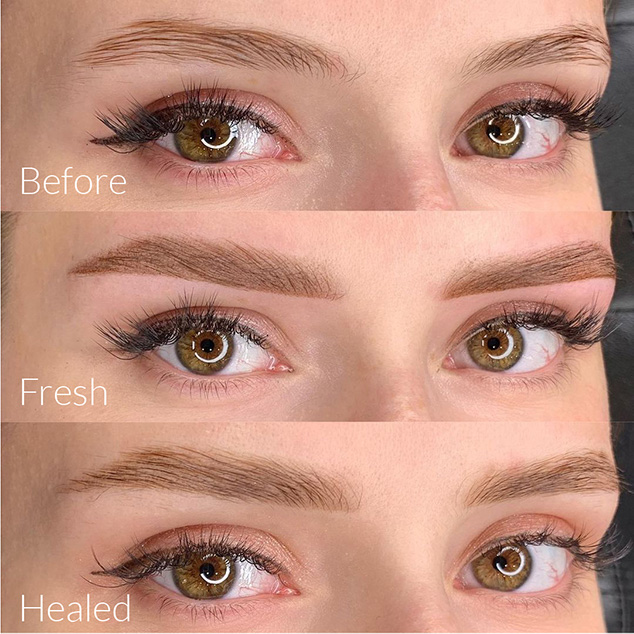
Gallery
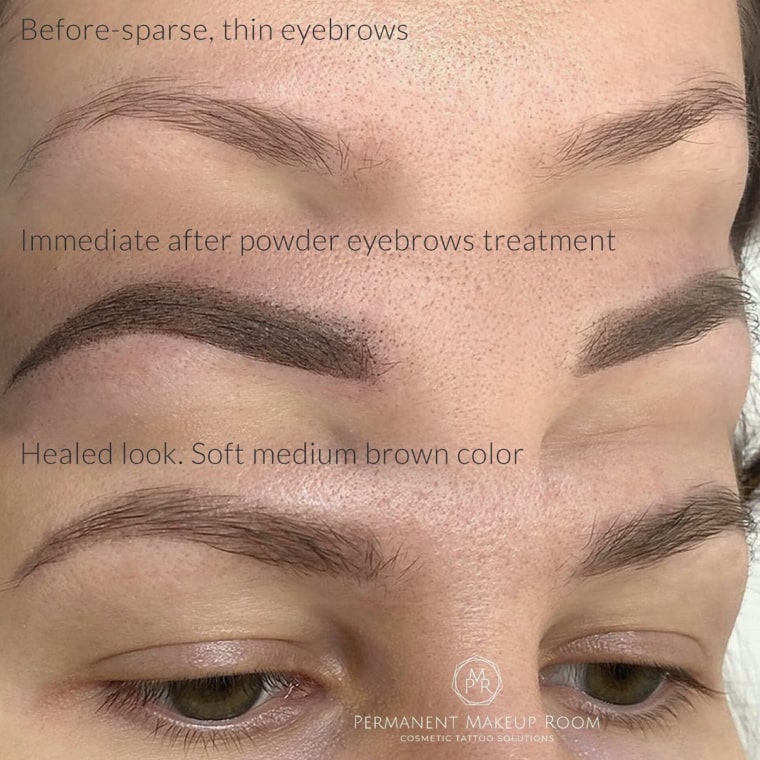
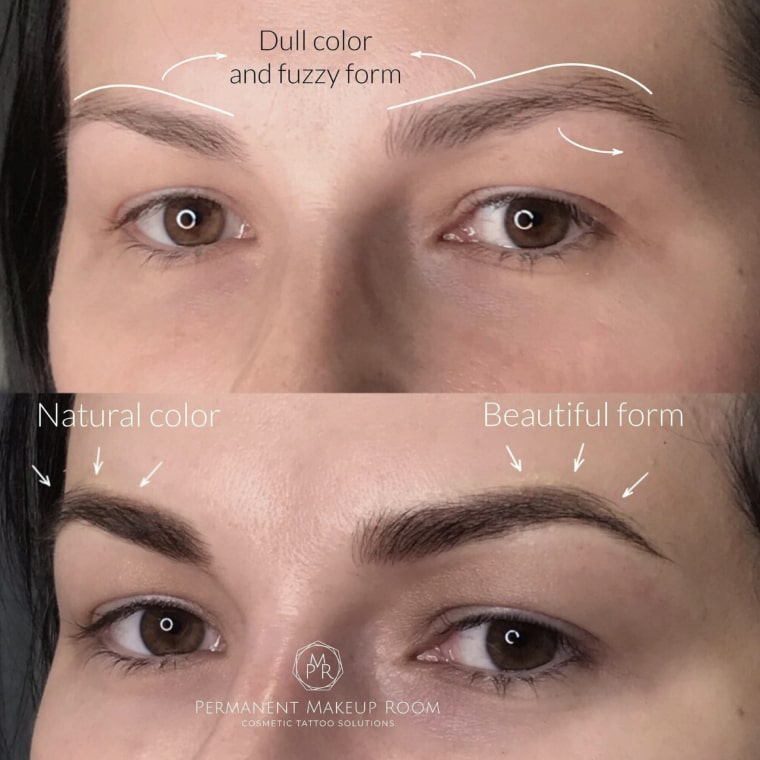
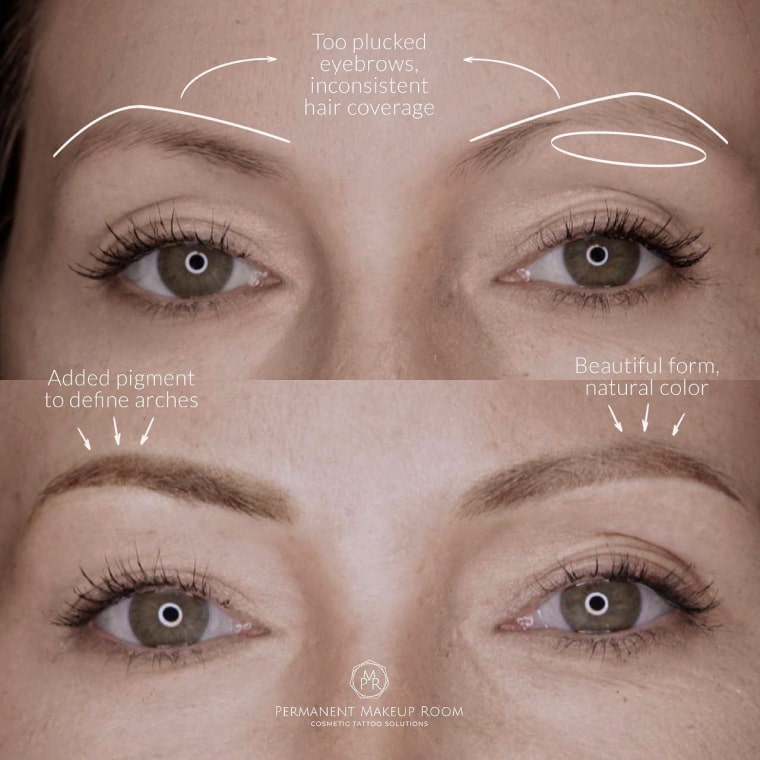
Before/After